DI-why did you wait?
Easy DIY gifts for the holiday procrastinator
November 15, 2022
The holiday procrastinator’s worst nightmare is checking the calendar and seeing Christmas Eve days away. This inevitably leads to stores filled to the brim with other last minute shoppers and it becomes near impossible to find the perfect gift for loved ones. Surely there must be a way to use common, everyday items to make useful gifts that will make family and friends smile, right? Pinterest yields a multitude of DIY projects, but how will the outcome fare with a short turnaround and an inexperienced DIYer?
Fear not, here’s a short list of DIY presents complete with the thoughts of a novice DIYer.

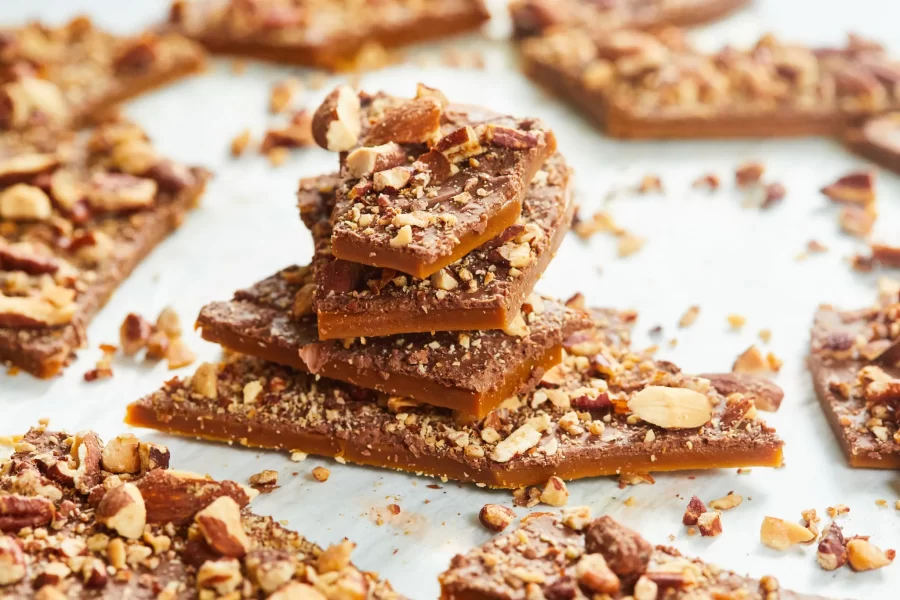
Saltine Toffee Bark
Perhaps the most difficult item on the list, (which means it only gets easier from here, folks!), the saltine toffee bark requires a little bit of precision. The recipe calls for making caramel from scratch (boiling brown sugar and butter together, then adding vanilla extract) to pour over saltines on a – and this part is VERY important – lipped cookie sheet. The lack of a lip on the cookie sheet could make for a pretty catastrophic mess to clean up later! Don’t forget tin foil to prevent the toffee from adhering to the cookie sheet!
Once the caramel is made, carefully pour it over the saltines and bake for five minutes or until the caramel is bubbling. Immediately pour chocolate chips onto the bubbling caramel and cover so that the chocolate becomes spreadable after a few minutes. This inexperienced DIYer ran out of tin foil to cover the treat, but the chocolate was still spreadable.
The next step is what takes the treat from plain old toffee to a fun christmas gift; the decorations! Find any Christmas themed topping(s) that the receiver of the gift will enjoy and go to town.
There are a lot of ways the toffee bark can go wrong,namely in making the caramel … stir often! but the outcome is worth the struggle. The bark can look extremely messy, but still fun and delicious. It’s one of those treats where you can simply throw the toppings together and still love how the final result looks. This specific recipe in finer detail can be found at https://www.momontimeout.com/christmas-crack-saltine-toffee-recipe/.
Gingerbread Hand Cream
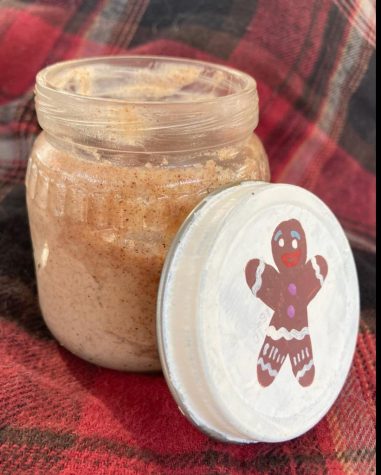
The gingerbread hand cream has a lot of ingredients, but they come together perfectly. Some can be found in the common kitchen spice rack while others might require a quick trip to the grocery store. Gather a pot to melt together shea butter and coconut oil to create the base and let them sit until room temperature, then chill in the fridge for 20-30 minutes. Once the chill has completed, whip in cinnamon, ginger and if you want an extra kick, some clove as well. The recipe used also lists adding cinnamon and ginger essential oil. Again, if you want an extra little kick to the scent, add some peppermint extract. Please note that the peppermint and clove are not mentioned in the recipe and are merely the outcome of experimentation with the mixture.
The hand cream is supposed to be kept for up to six months in an airtight container, baby food jars work great for this. As an extra personalization, the gift giver can paint the lid of the jar too. It is recommended to sand the lid a bit so the paint can better adhere. From there, simply paint a solid base and go to town with whatever fun design is in mind. Since there are so many ways to experiment and expand upon the mixture and container, the hand cream is pretty hard to mess up as a gift. Just be aware of any sensitivities the receiver might have!
For the specific recipe in finer detail, visit https://greenbeautymama.com/diy-gingerbread-body-butter/

Cinnamon Ornaments
Cinnamon ornaments are a classic Christmas craft that double as a great gift for anyone who likes the smell of cinnamon. The trinket consists of five easy to find ingredients; cinnamon, clove, nutmeg, applesauce and glue. Simply mix the correct amount of each ingredient together until they create a cookie dough-like substance (DO NOT EAT!). Spread the dough out and begin cutting them into fun shapes. Use a straw to cut holes in the designs and let them dry overnight.
Once the shapes are dry, tie strings through the holes to make them into fun ornaments that freshen up the room. If ornaments don’t feel like the way to go, glue magnets to the backs instead. Magnets are a great gift that will remain useful all year long rather than just around the holidays.
This recipe is a Pillsbury classic and can be found at https://www.pillsbury.com/recipes/how-to-make-cinnamon-ornaments/1ef534a4-b6c6-4cf8-810b-a311f1bcae09


